|
Introduction
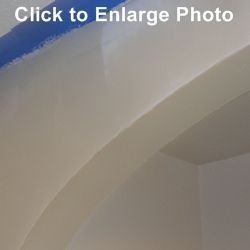
Drywall arches are not as difficult to build and finish as one might think. Once you have your drywall cut and up on the wall, you only need to cover the corners with flexible corner bead (pictured in Step 2), available at Menards and other home stores and building supply stores. The corners are then finished in a manner very similar to that used for regular outside corners.
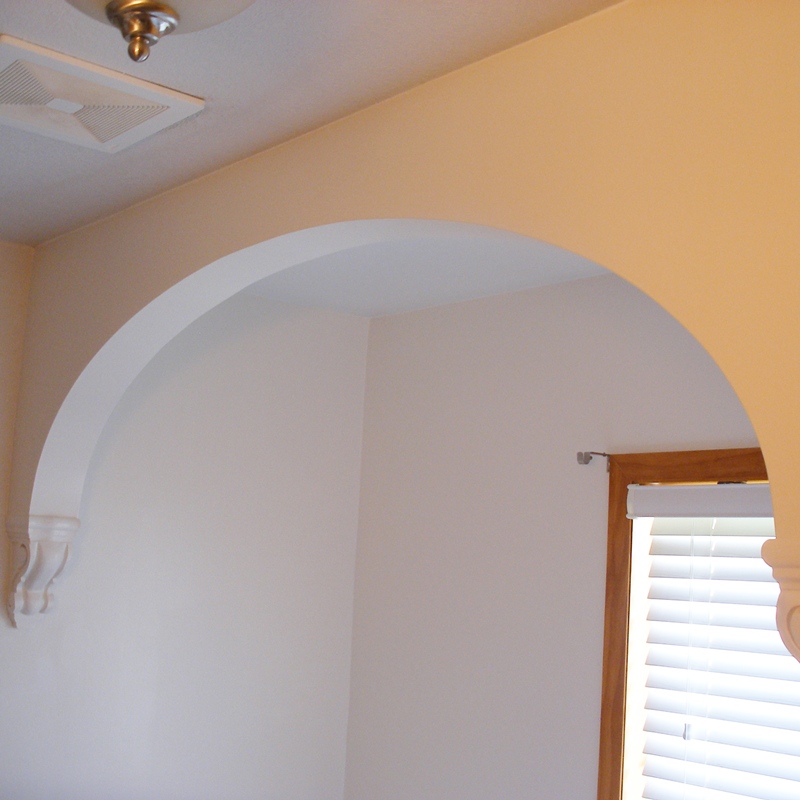
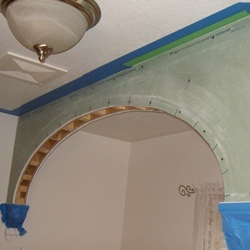
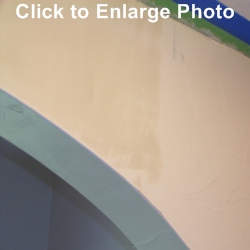
The photo on the right shows the arch we constructed and finished. Instructions for framing this arch are given at woodworkingcorner.com. |
Click On Photo To Enlarge |
| Step 1
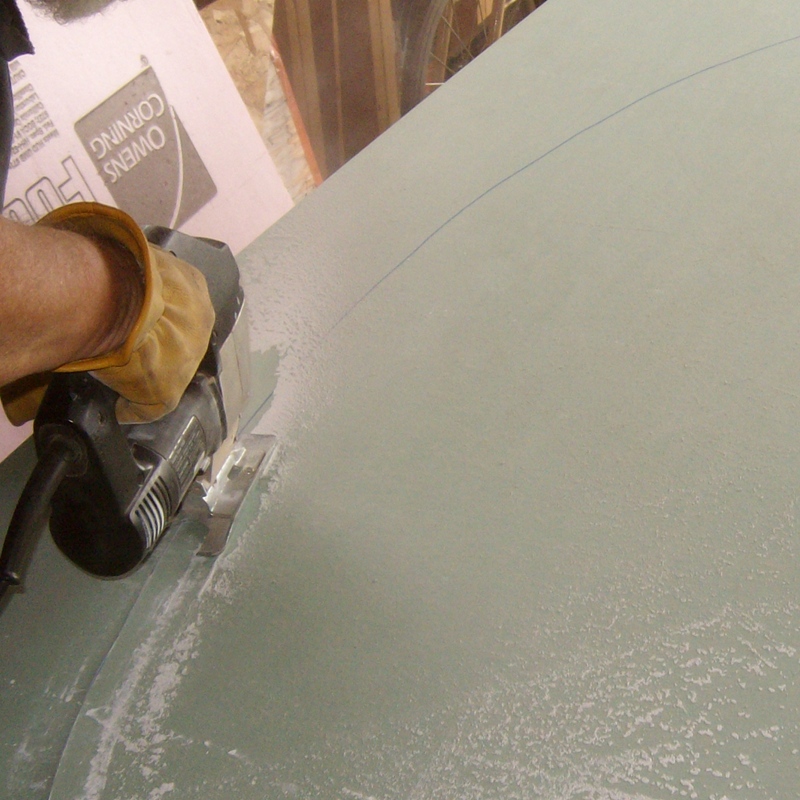
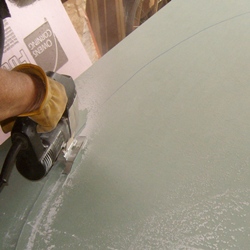
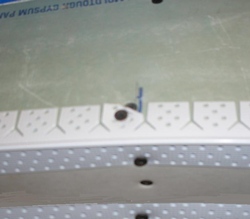
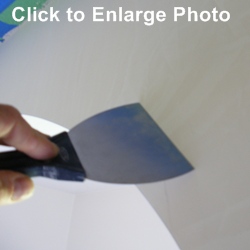
- Construct your arch as shown at woodworkingcorner.com. Use your cutout wood pieces as a pattern for your drywall. After marking the arch on your drywall, cut out the curved portion of the drywall with a jig saw, as shown right. Attach your drywall side pieces to your wood framing. Note in the photo below that the drywall is marked where the wood side supports are so that when the arched piece of drywall is attached you will know where to locate the screws. Also, you will need to know the locations of these wood supports when attaching the corner bead.
Cut out your arched drywall piece and gently and gradually bend it as you attach it. Use 1/4" thick drywall for this arched piece and lightly dampen the back side if needed to bend it in place. Also note the use of clamps to help hold the piece in place while you fasten it. Use the marks on the drywall as a guide for fastening. Note that USG now makes a flexible drywall, but you may need to special order it.
|
|
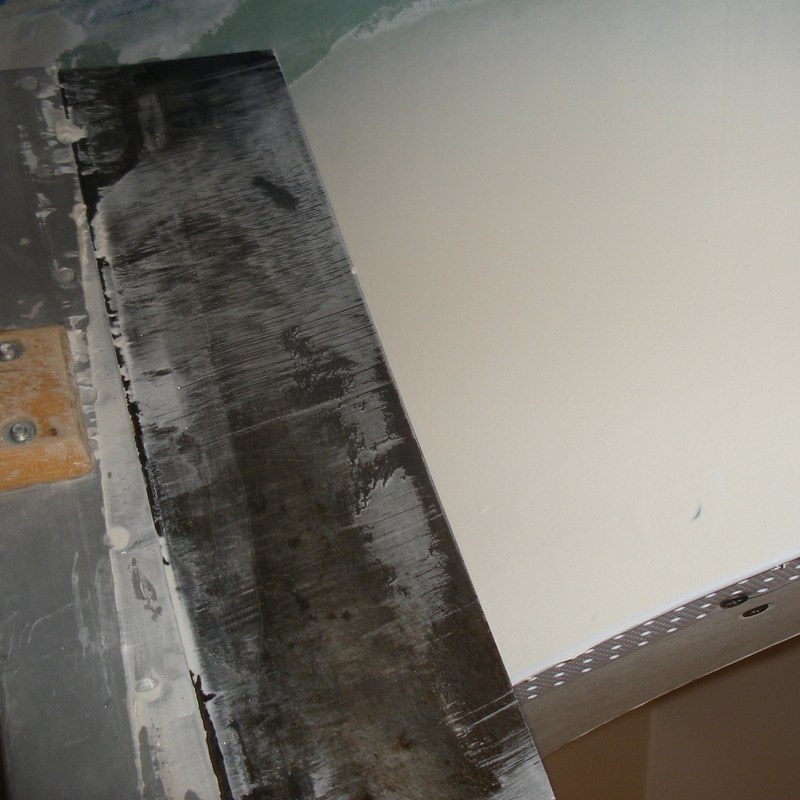
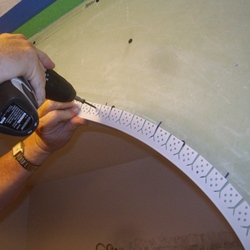
| Step 2
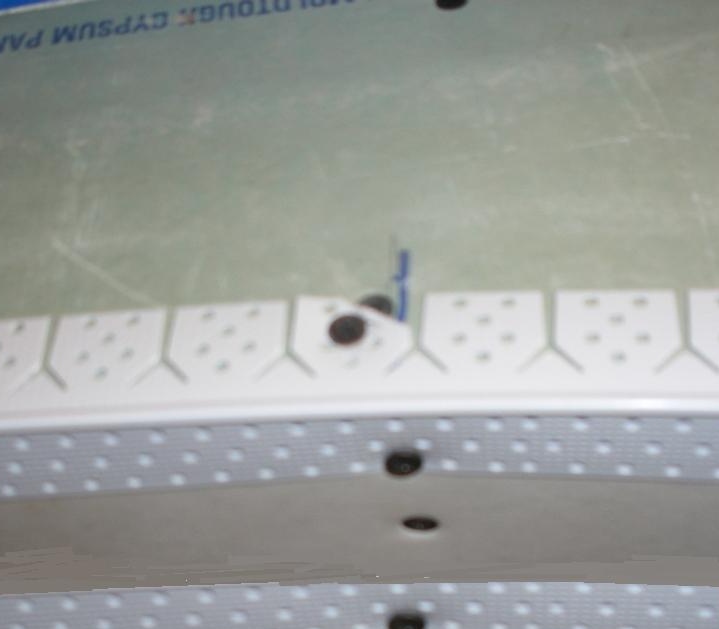
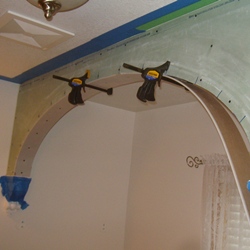
- Attach flexible corner beads (we got ours at a Menards home store) as shown on the right photo. Note that you should cut your corner bead a full inch longer than you measure and cut off the extra after it is all up - it is very easy to cut it too short! After the corner bead is attached, run a taping knife over the edge as shown in the lower right photo to identify any screws or tabs sticking up. If the knife touches or bumps on a screw, the screw must be driven further in. If the knife bumps over a tab, the tab should be trimmed off or fastened down. If you do not take this measure, you will not be able to finish properly!
In the photo below, a tab that was sticking up was trimmed off. Note that another corner bead will be attached on the back side of the arch - the two corner beads provide a guide for skimming mud off the arched area with a wide knife.
|
|
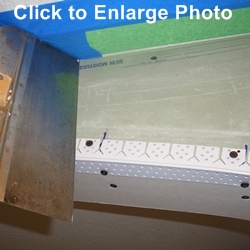
| Step 3
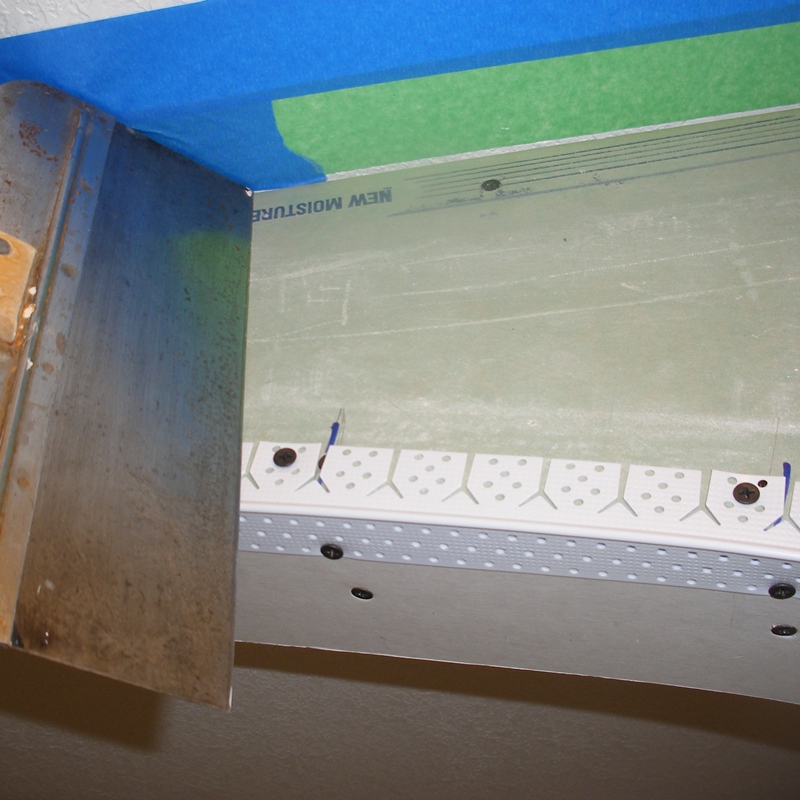
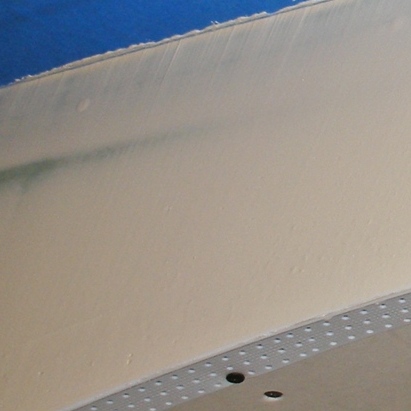
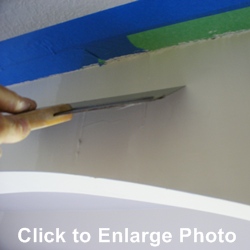
-Place a coat thick enough to completely fill in the area from the corner bead to the edge of the wall, as shown in the top photo on the right. Then use a wet down wide knife to skim off the compound, using the corner bead as a guide for your knife to glide over as you skim the mud. Don't worry about putting too much on; the taping knife will skim off all the excess.
In a similar manner, apply joint compound to the inside of the arch. Use a wide-enough taping knife to skim off the compound, allowing the knife to glide over the two corner beads.
A picture showing how the corner beads act as a guide for skimming off the mud are shown below.

|


|
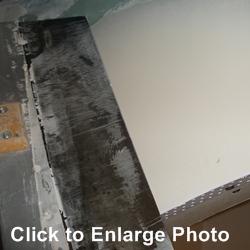
| Step 4
- Before applying the next coat, scrape down any bumps or ridges. Washboard type ridges should be scraped down with a taping knife that is scraped in a direction perpendicular to the ridges, as shown on the right.
After your surface is scraped level, place an additional coat in a manner similar to that of step 3.
Second Coat Added To Drywall Arch
|
|
| Step 5
- Repeat Step 4 to place one more coat over the top, if needed. In our case, we used All Purpose USG joint compound, which shrinks in a fair amount, so we felt the need to add another coat. |
|
Step 6
- Knock off any bumps and ridges, like before. Then, place a thin, 8-10" wide coat over your the previous coats, but skim this coat off perpendicular to the corner bead as opposed to using the corner bead as a guide. So you place the compound on and then skim off with a motion moving towards the bead. This will fill in any washboard-type ridges created in previous steps. See photo on right.
On the inside of the arch, place another coat, if needed, as done in Steps 3, 4, and 5. |
The Last Coats! (Except for touch-up) |
|
Step 7 - At this point, your surface should be nearly finished, except for minor imperfections. To get a professional-looking finish that may be painted without texture, use a trouble light or ordinary house lamp with shade removed and add small amounts of slightly thinned mud as needed. Skim off the mud immediately with a wet-down 4.5" taping knife, firmly removing all mud but that used to fill drag marks or imperfections, as shown on the right. |
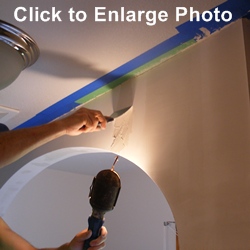
The Trouble Light Reveals Drag Marks
|
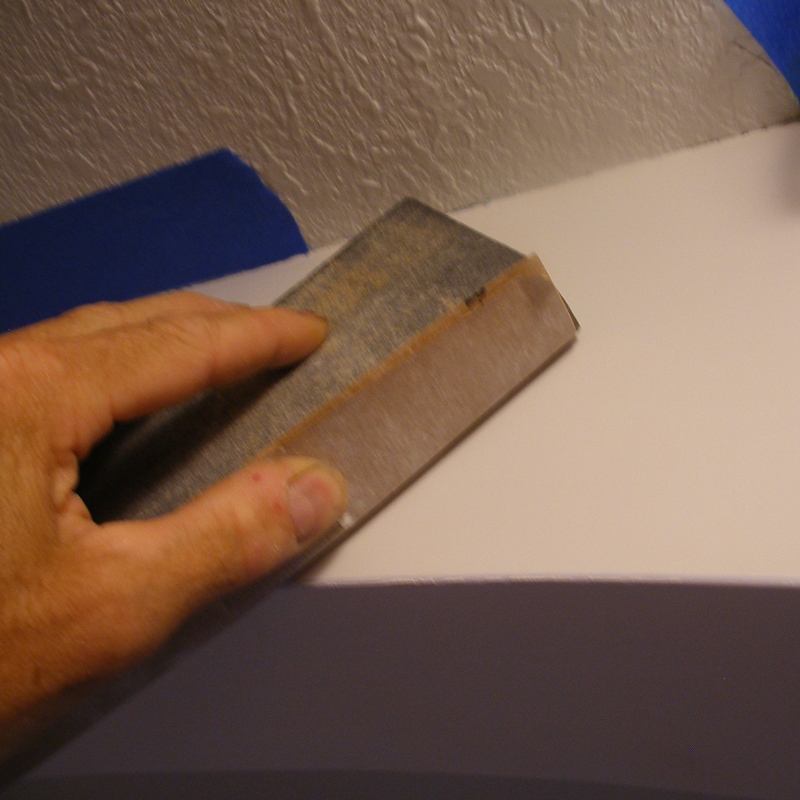
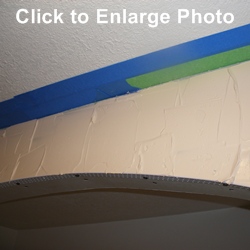
| Step 8
- Use a sanding block and some 200-220 grit paper to lightly sand the surface. Use a circular motion. You are only touching up the surface. You should not be removing a lot of compound. Also, any ridges sticking up should be knocked off with your taping knife as opposed to sanding them off.
Inspect the surface again with a trouble light and touch up if
needed.
|
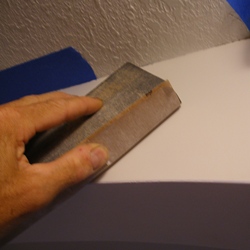
Sand at the Corner. Lightly Sand The Rest. |
| Step 9
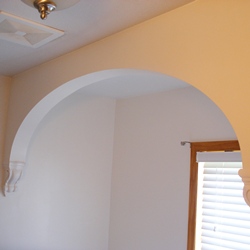
- Clean the dust off your wall. Then prime and paint. I would recommend a mold-resistant primer and paint if this is a bathroom project. |
Finished - Click To View Enlarged Arch!
|