|
Introduction
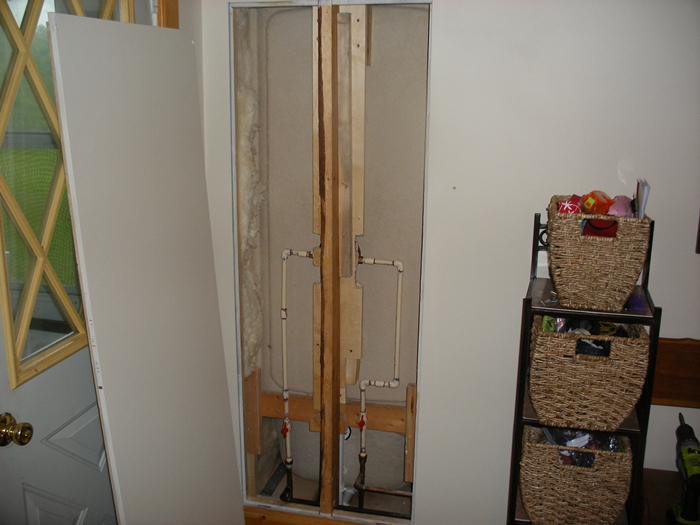
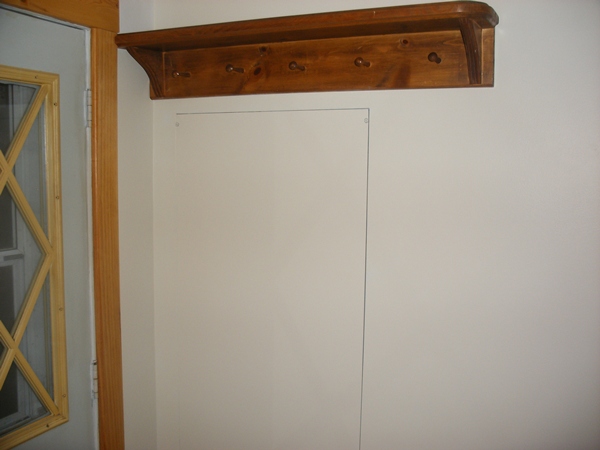
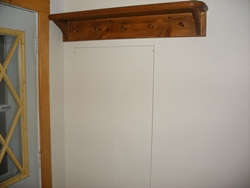
It is very advantageous to have access panels at the backside of your bathroom plumbing or other plumbing, especially if you have a leak! The alternative is to cut out a drywall panel and then tape and finish the wall each and every time you access the back of the plumbing - not a good way to go! In this case, I put in this access panel in a coat rack area when I replaced our shower. The panel is shown right - click on image to enlarge photo
The steps are shown below. |
|
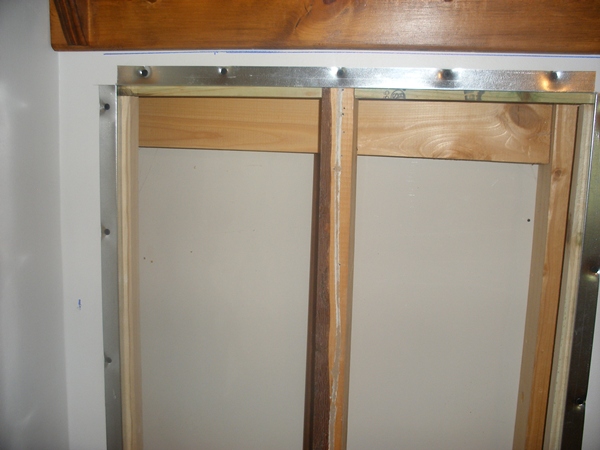
Step 1
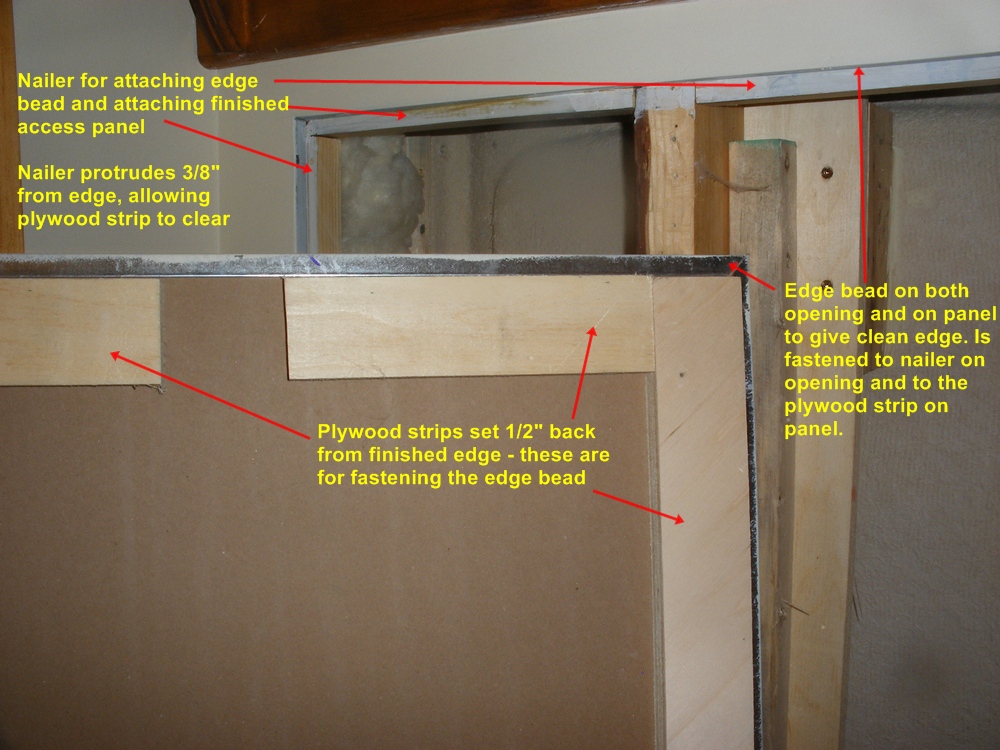
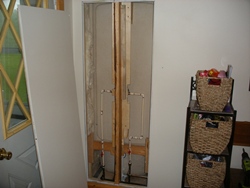
- Locate your vertical studs. Mark the rectangle of drywall you will cut out by making sure you have room to either have 3/8" of the stud sticking out or so that you can place a nailer that is fastened through the drywall a few inches in from the edge and protruding out 3/8". Cut out the drywall as cleanly as possible with as square and straight a rectangle as possible.
|

|
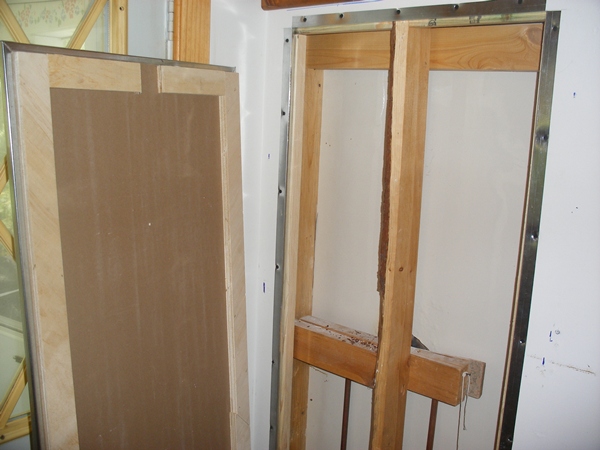
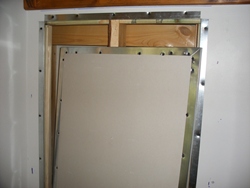
Step 2
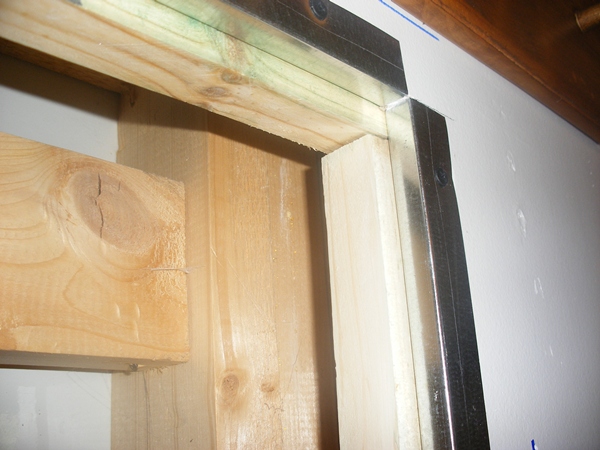
- Fasten edge bead on around entire outside of access panel opening. Notice how 3/8" of wood sticks out all around the opening.
CLICK ON ANY IMAGE TO SEE ENLARGED VIEW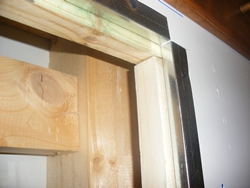 |
 |
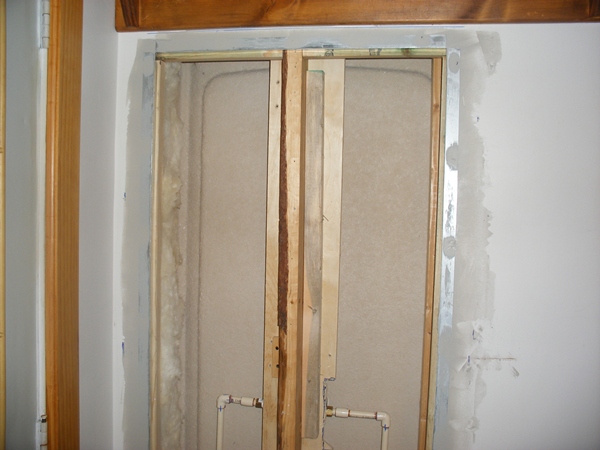
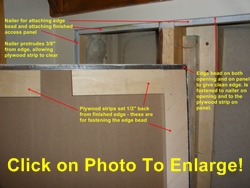
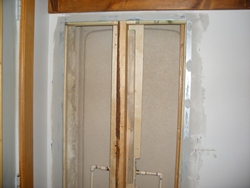
Step 3 - After all the edge bead in on the opening, measure the opening and cut out a piece of drywall that is a little smaller. Fasten strips of plywood (see right) that are 1/2" from the finished edge of the patch piece to the back of the drywall. Place edge bead over the edges of the panel, but before you fasten it down completely, make sure your panel fits in the opening properly. You may have to sand down an edge here or there (I did). When all fits OK, fasten the edge bead on the panel.
|
 |
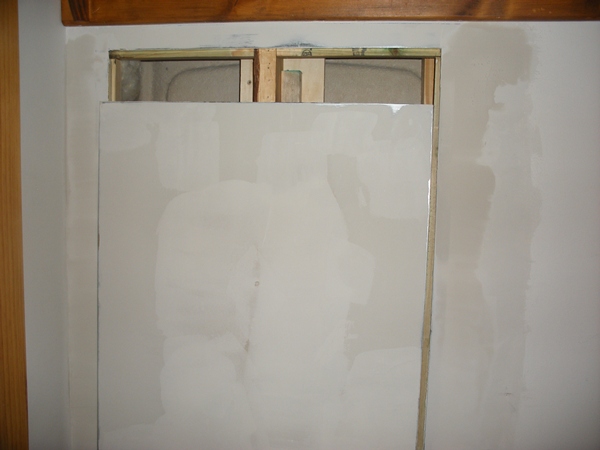
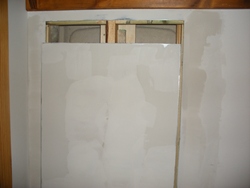
Step 4
- Apply joint compound to all the corner bead, covering all but the very edge. This will take about 4 or more coats so be patient! After each coat dries, scrape off any bumps or ridges of mud before applying the next coat. Sand lightly when all coats are on. See finishing corners for more info.
|
 |
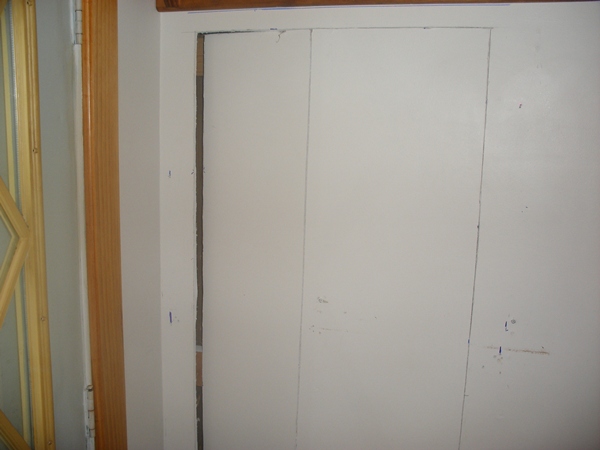
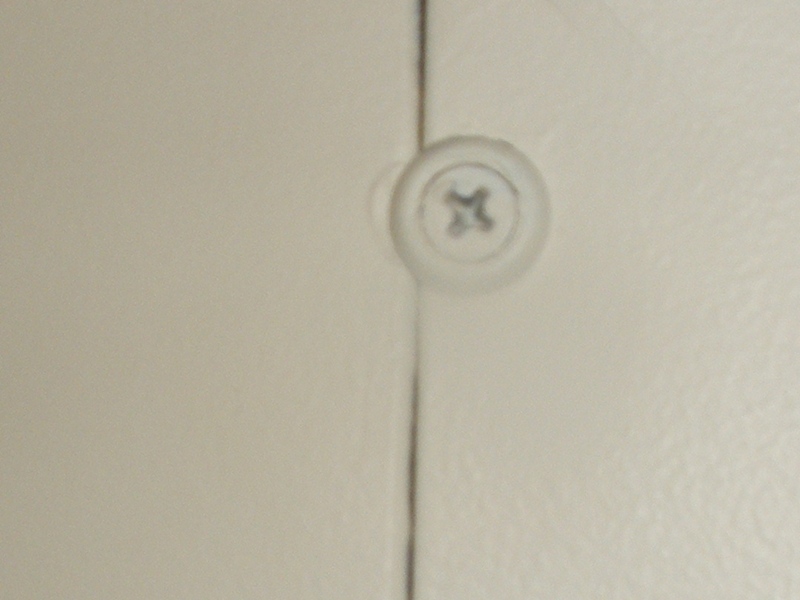
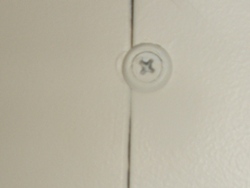
Step 5 - Prime and paint both your wall opening and panel. Drill holes at the top corners and bottom corners of the panel and use screws and special washers to fasten the panel to the 3/8 of wood protruding on the edges of the opening underneath - see lower photo on right. In the photo of the drywall plumbing access panel below note that the coats cover the seam!

|
|