|
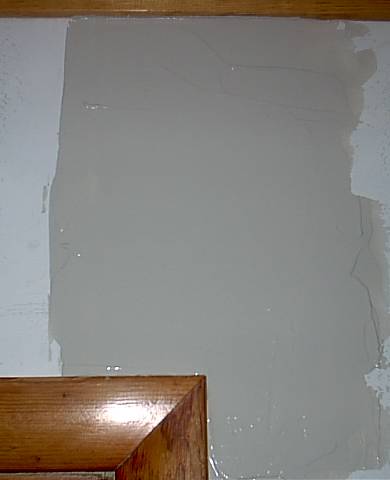
If you live in a climate like I do, with temps that
vary from -35 Deg F to +100 Deg F, you may have had your drywall
joints crack above or below a window or door as
shown here.
This happens because there is a joint at this location which also
happens to be an area of high stress due to temperature variation
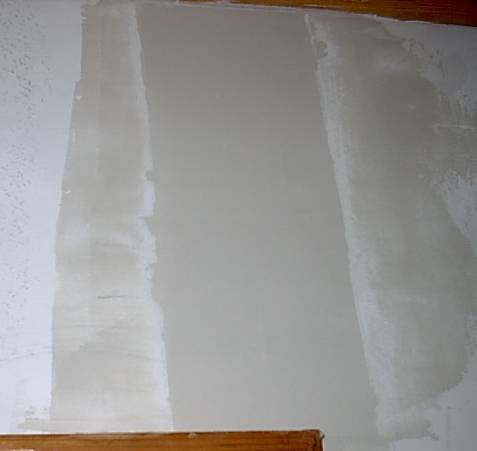
associated with the door or window. There is a way to avoid
this: Install your drywall (also known as sheetrock) so that there is
not a joint directly above or below the window or door
as shown here.
What if you don't wish to totally redo all your
sheetrock but want to repair the crack? Here is a method I use
given step by step:
Step 0 - Quickly review
this graphic that covers all the steps first. Then the steps below will be easier
to follow.
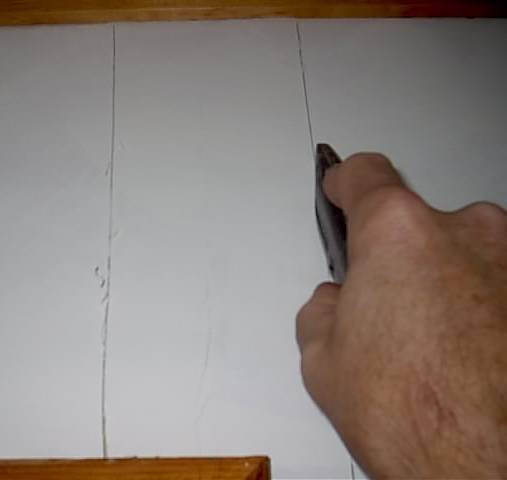
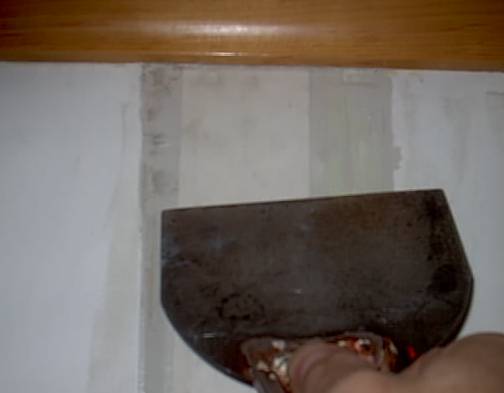
Step 1 - Score the drywall 1/2" to 1" on each
side of the width of the tape as shown below.
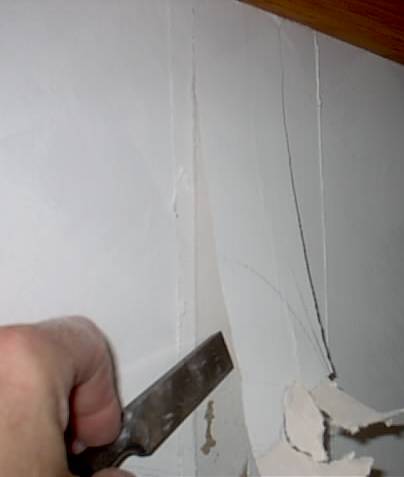
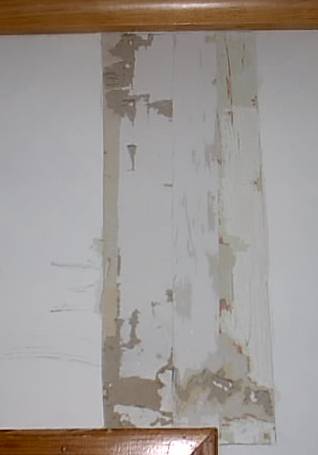
Step 2 - Use a putty knife or an old wide
chisel (that you don't mind dulling a bit more) to lift off the old
tape. Once you get it started, it peels up in a nice continuous sheet
as shown
here.
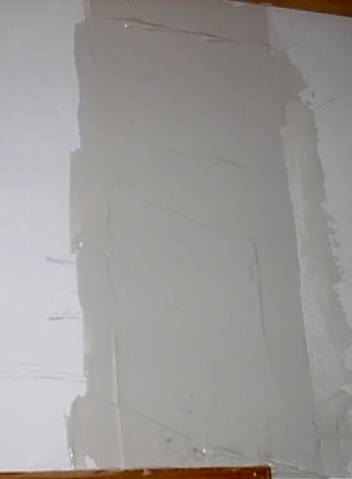
Step 3 - Use the chisel of putty knife to
remove the surface mud out to the score marks. You want a little
more width than the tape so you can properly imbed the tape. Get as
close to the original paper surface as you can. If you take off
a little of the original drywall paper this is not a problem. A photo of the recessed area after it has been cleaned out is shown below.
Step 4 - Cut a piece of tape for the new
joint that is about 1/8" shorter than the joint. Place some mud in a
clean mud pan and thin it slightly. To thin it, wet the 4 inch
knife down in water and mix it into the mud. Do not pour water
directly into the mud. Place a layer of mud on the entire
recessed area as shown below. Run your tape strip through a bucket of water or
under a running faucet briefly. Shake excess water off the strip.
Place the strip onto the mud - it should adhere firmly without any air
gaps. Use a 4 inch knife to press down firmly on the tape, squeezing
the mud out the sides. You may need to hold the tape at the top
with one hand. In the picture below on the right, you can see that the tape is tight to the wall and most
of the mud is pressed out the sides and removed. When this tape dries,
it will be well below the painted surface of you wall and can be
coated and finished level with the wall.
 |
 |
NEW! Strait Flex now offers a composite tape that is 10 times stronger than paper tape and may be used in place of the paper tape in Steps 4 and 5 - read about this crack repair tape in my drywall blog.
Step 5 - After the tape of step 4 is
thoroughly dry, use a taping knife to knock off any ridges that may be
present that will prevent you from smoothly drawing off the mud in the
next coat. Then use a wide knife to place a coat over the top that overlaps the previous coat and skim off, as shown below. This will just about fill the recess completely, but more coats are needed! Do NOT sand at this point at all.
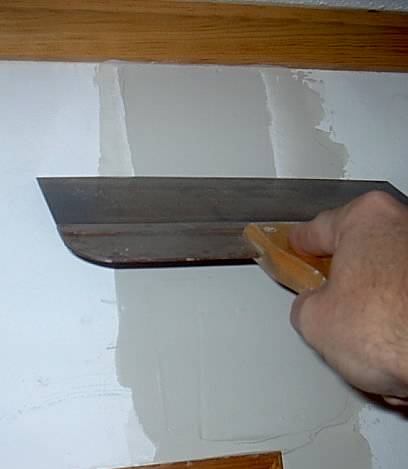
Step 6 - When the previous coat is thoroughly
dry, scrape off any high spots or bumps of drywall with your taping
knife as
shown here. (Don't SAND!) Then add another coat that overlaps the
recess by an inch or so on each side. Scrape after it is dry and add another thin coat if needed. Your wide taping knife edge should lie perfectly flat over the joint with no gap under.
Step 7 - After all coats are on, again knock off any
tiny bumps or ridges. Then sand very lightly with 220 grit on a 3.5" by 8" block as needed, taking care to not create a depression - merely touch up the surface. Prime and paint
this section of the wall - for best results paint up to a corner.
Search Drywallinfo Using Search Box Above!
Copyright 2014 - Michael Sakowski -
More Info -
Privacy Policy
- Decorative Wall Art |